As you begin your journey as a Bartender, one key aspect that you’ll soon realize is the importance of keeping your tools clean. Not only does cleanliness play a vital role in the hygiene of the drinks you serve, but it also affects how well your tools perform and how long they last.
This guide on how to clean Bartender tools is designed to help you effortlessly manage the cleaning process. We’ve gathered easy tips and helpful advice just for new Bartenders like you, so your tools stay in great condition for every shift.
Why Keeping Your Bartender Tools Clean Matter
Keeping your Bartender tools clean is not merely about aesthetics — it significantly impacts the quality and safety of your drinks. Dirty or improperly cleaned tools can alter the taste of your cocktails and potentially pose health risks to your patrons.
For instance, residues left on shakers or jiggers can carry flavors from previous drinks, ruining cocktails for your next customer. Moreover, consistent cleaning prevents tool degradation, saving you from premature replacement costs and enhancing the longevity of your equipment.
General Tips for Keeping Bartender Tools Clean
Efficient cleaning starts with immediate action; the longer residue remains on your tools, the harder it becomes to remove. Here are some general guidelines to follow for all your Bartending tools:
- Clean immediately: After each shift or use, rinse all tools promptly with hot water. This simple step prevents build-up and makes it easier to remove leftover ingredients. Allow them to soak briefly if they are particularly dirty, which will help loosen any stubborn residues.
- Avoid harsh chemicals: Stick to mild soap and water for cleaning, as many abrasive cleaners can damage the finish of your equipment over time. Harsh chemicals may also leave behind residues that can affect the flavor of drinks or cause allergic reactions in customers. Using a gentle, biodegradable soap is best to ensure the longevity of your tools.
- Rinse thoroughly: After cleaning, ensure that there’s no soap or cleaning solution residue remaining on your tools. Any residual cleaner can affect the taste of your drinks or lead to adverse reactions. Rinse each item under running water, ensuring you get into every crevice and corner where soap might linger.
- Dry properly: Proper drying is crucial to prevent water spots and rust. Use a clean, lint-free towel to pat dry each tool after rinsing, making sure to remove any excess moisture. Allow tools to air dry completely before storing them away to avoid trapping moisture, which can lead to rust and deterioration.
How To Cleaning Each Bartender Tool
Here’s how to clean a variety of Bartending tools effectively, ensuring each one is ready for the next round:
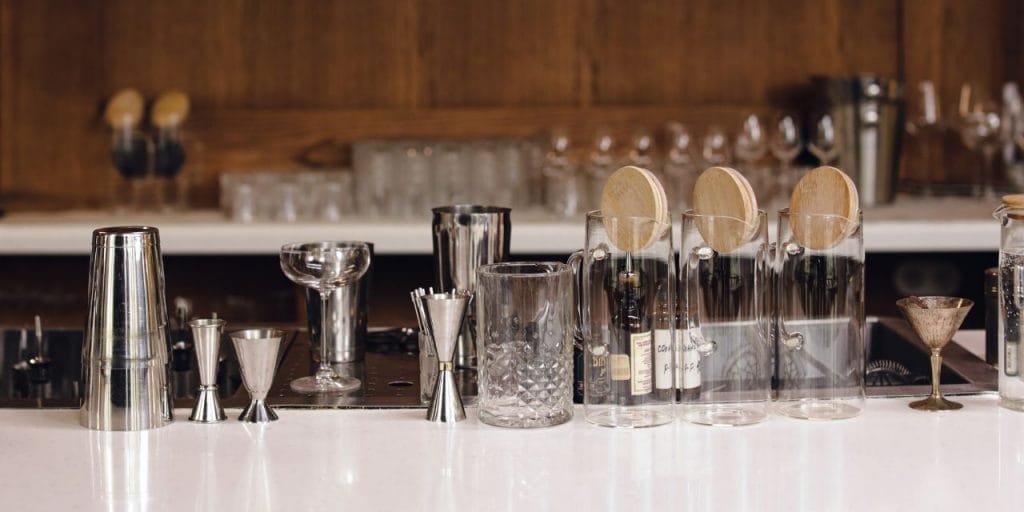
Shakers
Start by disassembling your shaker and cleaning each part with warm, soapy water. Pay particular attention to the strainer and cap, as they often trap sticky residue. Rinse thoroughly to eliminate all soap, and dry completely before reassembly.
Strainers
Strainers can collect debris and oils, making them tricky to clean. Use a small brush to scrub the mesh and springs carefully. Rinse under hot running water to remove any remaining residue.
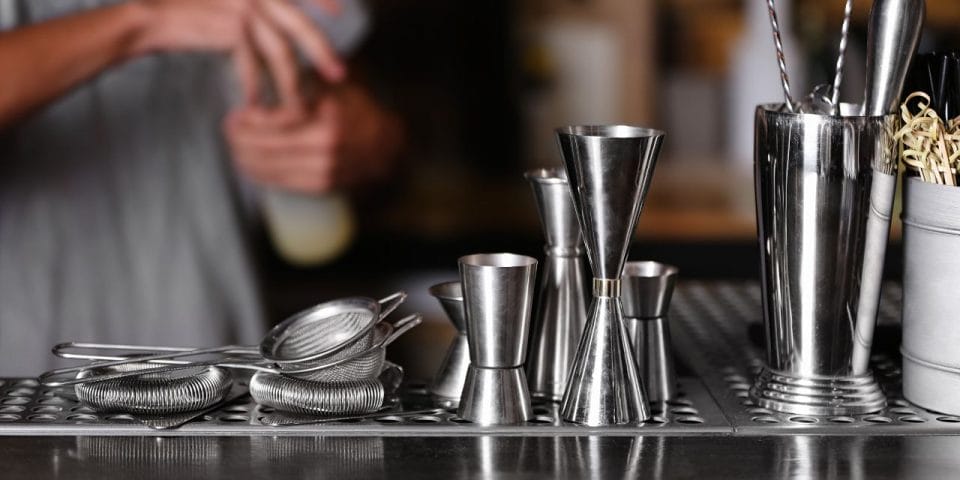
Jiggers
Fill each jigger with warm, soapy water, allowing it to soak momentarily. A gentle scrub with a sponge usually suffices, followed by a thorough rinse under running water.
Muddlers
If you’re using wooden muddlers, hand wash them gently with mild soap. Avoid submerging them in water for long periods; instead, wipe with a damp cloth and let them air dry to prevent warping.
Bar spoons
Bar spoons should be cleaned along their full length, including the handle and bowl. A simple wash and rinse are usually enough, but ensure to maintain the polished shine.
Citrus juicers
Disassemble any removable parts and scrub thoroughly, especially in places where pulp can remain. Rinse well to remove all traces of debris.
Mixing glasses
Treat these like fine glassware. Use a soft sponge with warm, soapy water to clean and polish to avoid streaks.
Ice tongs
Clean ice tongs after each use, focusing on the gripping surfaces. A quick wash under warm, soapy water and a rinse should suffice.
Pour spouts
Soak pour spouts in warm soapy water to loosen any sticky residues. After soaking, rinse and sanitize them to maintain hygiene.
Glassware
Proper washing techniques, followed by thorough polishing, will help maintain clarity and prevent spots and streaks. Consider using a specific glass cleaner for sparkling results.
Bottle openers
Clean bottle openers with a damp cloth or sponge to remove any sticky residue. Rinse and dry thoroughly to prevent rusting, especially if they have metal components.
Cocktail picks
These should be sanitized after use, especially if they are used with garnishes. Wash them with warm, soapy water and let them air dry.
Zesters and peelers
Ensure these tools are cleaned post-use to remove citrus oils. Hand wash with mild soap and dry to avoid rusting.
5 Storage and Maintenance Tips
Proper storage extends the life of your tools and helps you identify when you need replacements. Here are some tips for effective storage and maintenance of your Bartender tools:
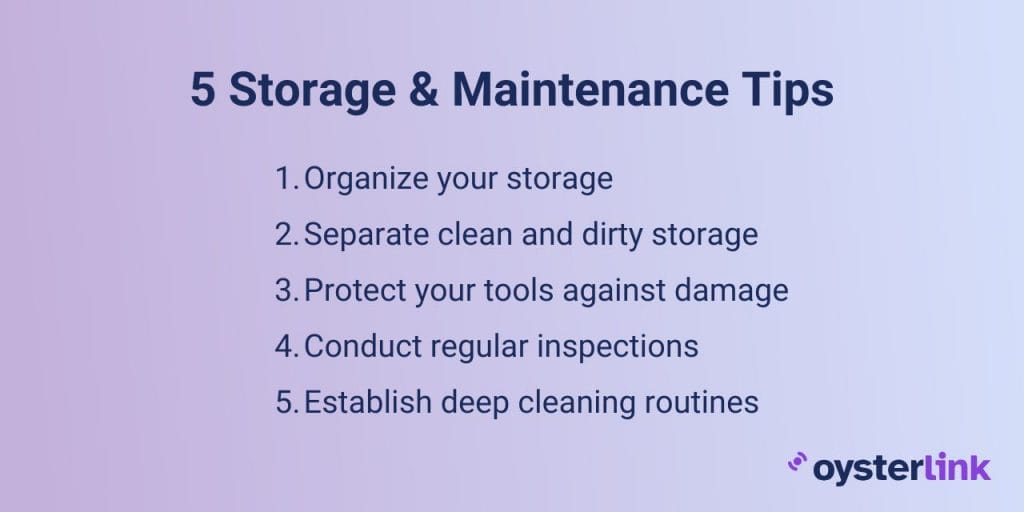
1. Organize your storage
Use a clean, designated space for your tools, such as a caddy or a toolkit that keeps everything in one place. This prevents tools from getting misplaced and helps you know exactly where to find each item during service. Consider using drawer dividers or magnetic strips for easy access to small tools.
2. Separate clean and dirty storage
If possible, designate a separate area for dirty tools to prevent cross-contamination. This practice can improve efficiency and hygiene during busy hours. A clearly labeled container can help staff quickly identify where to place dirty items, ensuring that clean tools remain uncontaminated.
3. Protect your tools against damage
Store sharp tools like knives in protective cases or holders to prevent accidents and injuries. Consider investing in a designated bar mat to provide cushioning for delicate items like glassware, and keep heavier items on lower shelves to avoid any risk of falling.
4. Conduct regular inspections
Periodically inspect your tools for signs of wear and tear. Look for any rust, chipping or cracking that could indicate it’s time for a replacement. Keeping an eye on your equipment ensures that you’re always working with the best tools, enhancing your service quality and maintaining a professional image.
5. Establish deep cleaning routines
Set up a regular routine for deep cleaning your equipment that goes beyond day-to-day maintenance. This could involve soaking tools weekly or monthly, depending on usage.
See also: Best Practices for Maintaining Bar Tools
Common Issues and Effective Solutions
Even with the best cleaning and maintenance practices, challenges may arise. Here are some common issues and solutions:
- Stains on shakers or glassware: If your shakers or glassware develop stubborn stains, a soak in half vinegar and half water solution can help lift the blemishes. After soaking, scrub gently and rinse thoroughly. If stains persist, consider using a specialized glass cleaner or a mild abrasive paste like baking soda.
- Rust on metal items: For tools that have developed rust, mix baking soda with water to create a paste. Apply it to the rusted area, let it sit for 10-15 minutes, then scrub gently with a soft brush or cloth before rinsing. For severe rust, consider using a rust remover specifically designed for the type of metal.
- Sticky residue on pour spouts: If pour spouts become sticky and hard to clean, soak them in a mixture of vinegar and water for 10-15 minutes, then scrub and rinse to restore functionality. Make sure to dry them completely before storing to prevent moisture-related issues.
If at any point you find an unsolvable issue, don’t hesitate to ask more experienced Bartenders or check industry forums for guidance. Knowledge sharing is a fundamental part of the Bartending community, and learning from others can enhance your skill set.
Conclusion
Understanding “How to Clean Bartender Tools” is vital for new Bartenders venturing into this vibrant industry. Not only does proper cleaning enhance the taste and safety of your cocktails, but it also conveys professionalism and dedication to your craft.
Maintaining a set routine for cleaning and organizing your tools can improve overall efficiency, preventing cross-contamination while promoting a safe work environment.
As you embrace these best practices, check out OysterLink. This platform offers invaluable career advice, industry insights and job opportunities for Bartenders.
Hiring for your hospitality business?
Post Jobs for FreeLooking for high-paying jobs?
Find Jobs HereHow To Clean Bartender Tools: FAQ
While some metal tools may be dishwasher-safe, it is usually better to hand wash most Bartender tools to preserve their quality and finish. Be sure to check the manufacturer’s instructions before using a dishwasher for any specific items.
It is advisable to clean your tools after each use. However, some items, especially those used frequently in a busy bar environment, might benefit from more frequent cleaning to ensure optimal hygiene.
If your tools develop lingering odors, soaking them in a mixture of white vinegar and water for about 10–15 minutes can be effective. After soaking, gently scrub them and rinse thoroughly, which should help eliminate any unpleasant smells.
It is wise to avoid using abrasive cleaners, bleach or harsh chemicals that could damage the finishes of your tools. Sticking to mild, biodegradable soaps is usually a safer choice, and checking for manufacturer recommendations can also be helpful.
To keep your wooden tools like muddlers and spoons in good condition, wash them by hand with mild soap and avoid soaking them in water. Applying food-safe mineral oil occasionally can help prevent the wood from drying out and cracking.

Written by Sasha Vidakovic
Sasha is an experienced writer and editor with over eight years in the industry. Holding a master’s degree in English and Russian, she brings both linguistic expertise and creativity to her role at OysterLink. When she’s not working, she enjoys exploring new destinations, with travel being a key part of both her personal and professional growth.

Reviewed by Marcy Miniano
Marcy is an editor and writer with a background in public relations and brand marketing. Throughout her nearly decade-long career, she has honed her skills in crafting content and helping build brands across various industries — including restaurant and hospitality, travel, tech, fashion and entertainment.