This guide walks you through every step you need to post a job on Monster quickly and correctly.
How To Post a Job on Monster
Once you follow the steps below, you’ll be able to publish a polished, detailed job post on Monster with ease.
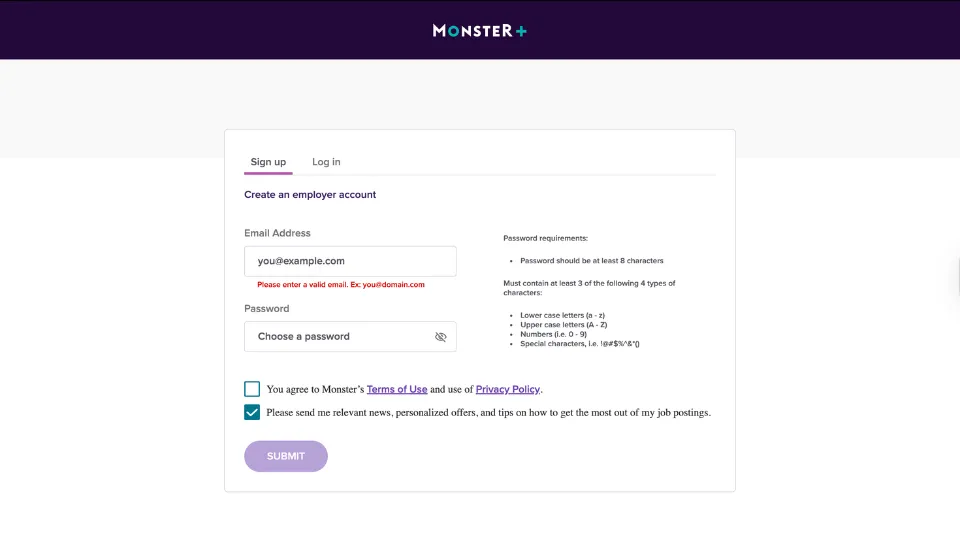
1. Create a Monster employer account
You’ll be asked to create an account using either Monster or Monster+.
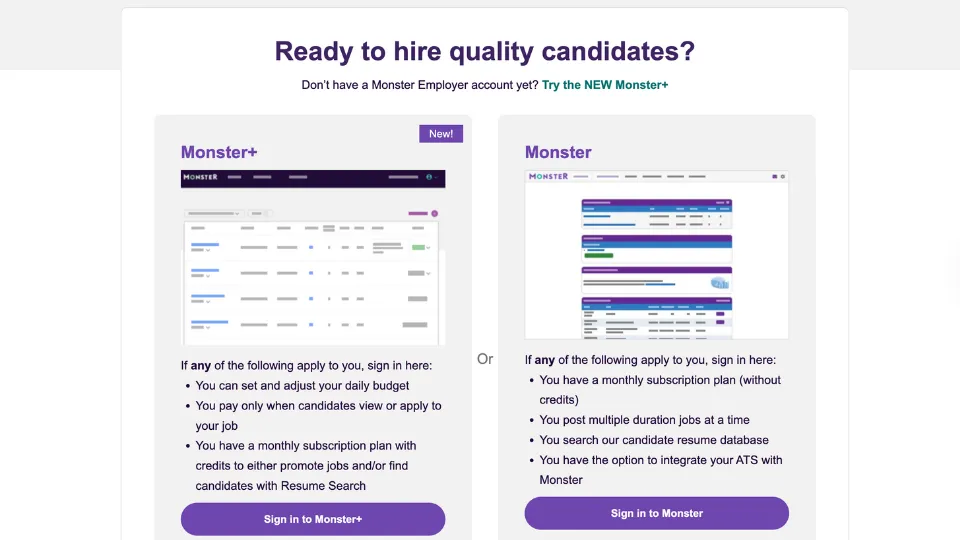
New users are encouraged to sign up for Monster+ since it lets you set a daily budget, pay only when candidates view or apply to your job and use monthly subscription credits for promoting roles or searching resumes.
The difference between Monster and Monster+ is that Monster+ follows a pay-as-you-go model with adjustable daily budgets, while the standard Monster platform uses traditional monthly subscriptions, duration-based job posts, resume database search and optional ATS integration.

The Fastest Growing
Restaurant & Hospitality Job Platform
Looking for top paid jobs? Or Hiring for your business?
2. Confirm and verify your email address
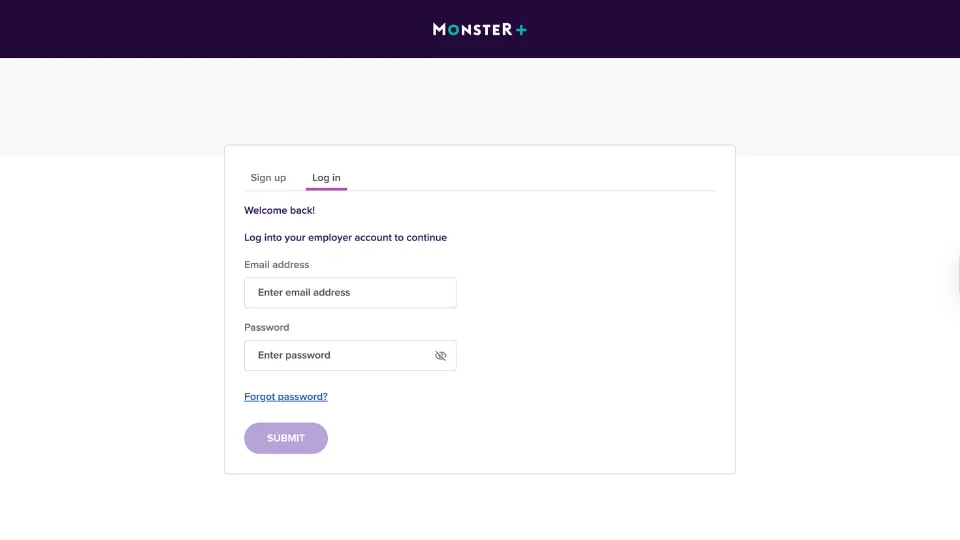
To finish creating your Monster+ employer account, you’ll need to verify your email address.
After signing up, log in using the email and password you registered with and Monster+ will prompt you to confirm your email.
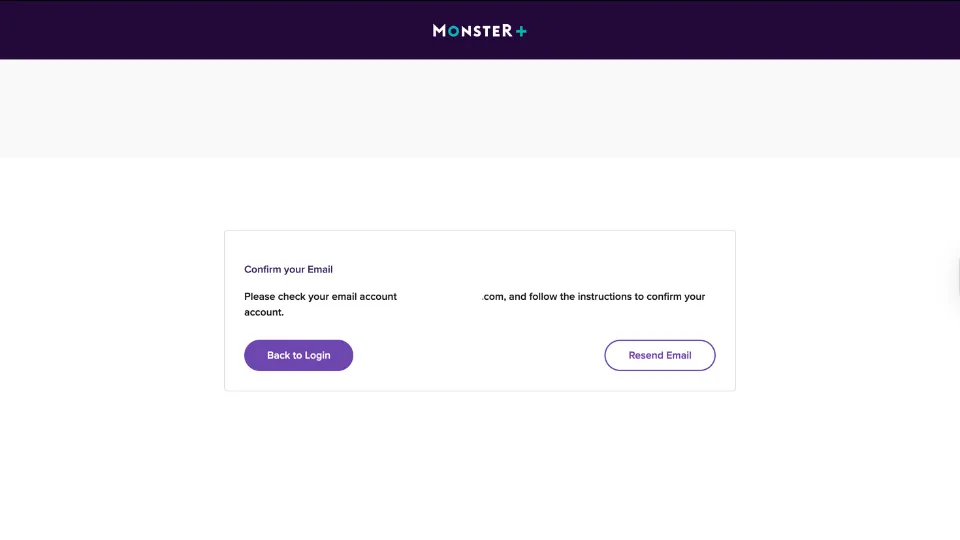
Check your inbox for the verification message and click the link provided to complete the process. Once verified, you’ll see a confirmation screen confirming your email is successfully activated.
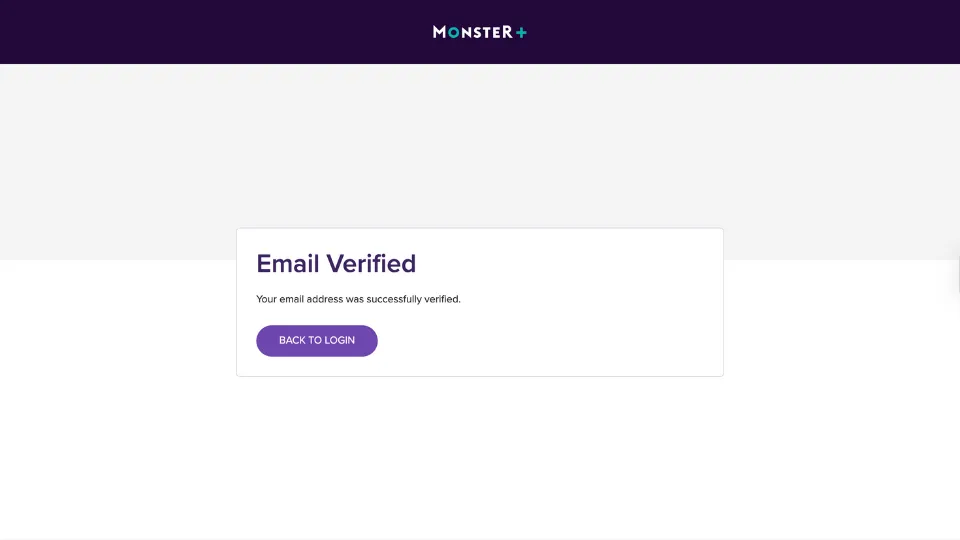
From there, simply click Back to Login to return to the sign‑in page and continue setting up your employer account.
3. Get started with your employer profile
After verifying your email, Monster+ will guide you to a setup page where you’ll need to enter basic company information.
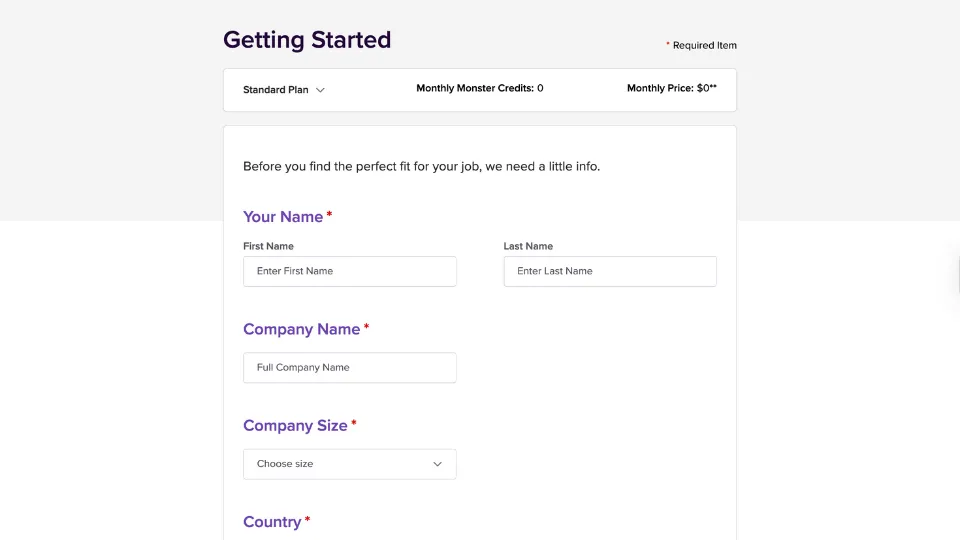
This includes your first and last name, your full company name, the size of your company and your country.
4. Enter your job basics
After setting up your employer profile, Monster+ will take you to the Job Basics section, where you begin creating your job post.
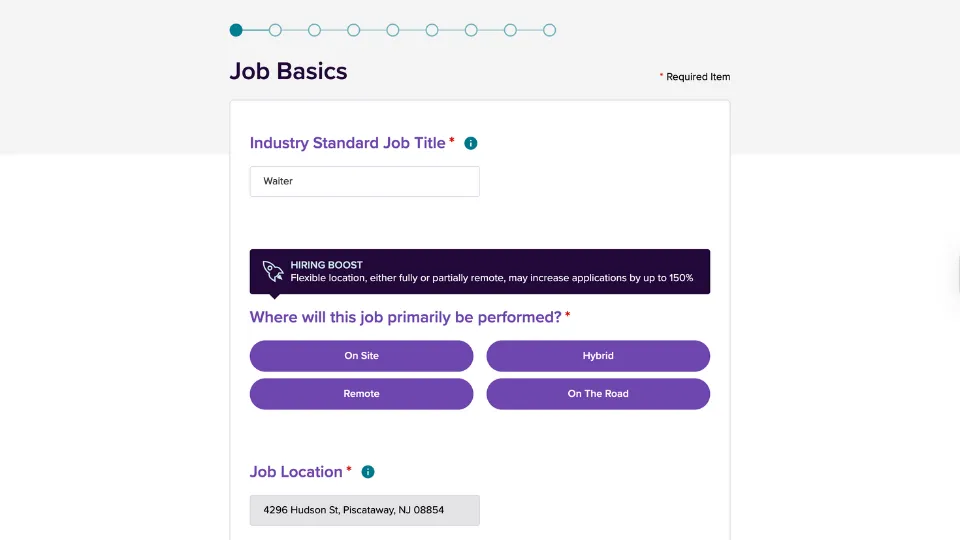
Start by entering the industry‑standard job title for the role you’re hiring for. You’ll also be asked where the job will primarily be performed, with options such as on‑site, hybrid, remote or on the road.
Once you select the work arrangement, Monster+ automatically fills in the job location based on your company address, though you can update it if needed.
5. Add your job details
In the Job Details section, you’ll specify key information about the role you’re hiring for.
Start by selecting the employment type, such as full‑time, part‑time, temporary, contractor, intern or volunteer. Monster+ also includes a note that listing a salary can increase applications, so you’re prompted to enter the pay range for the position.
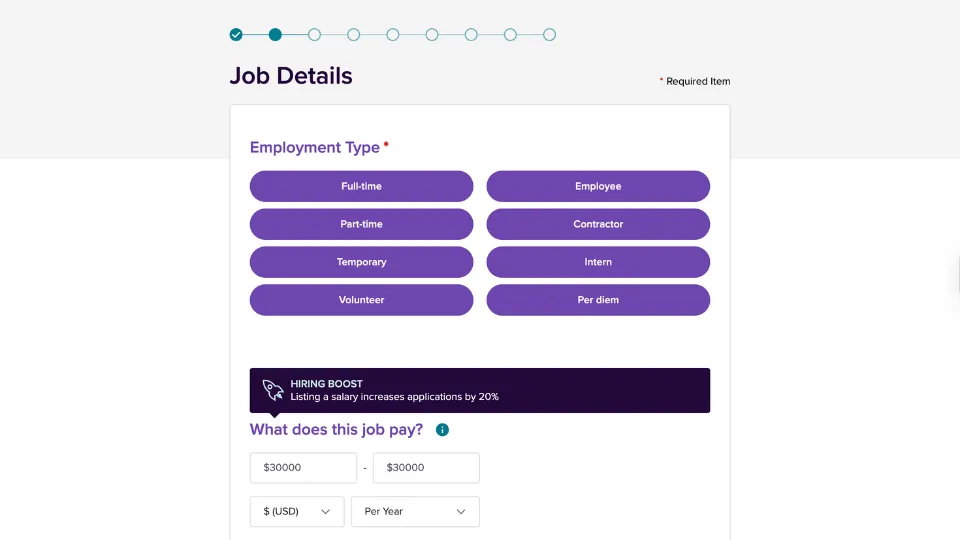
Choose the minimum and maximum salary, select your currency and indicate whether the rate is per year, per hour or another interval.
At the bottom of this section, you’ll also find options to add additional compensation and benefits to give candidates a clearer picture of the total package.
6. Describe the job
In this step, Monster+ asks you to provide the core details that make up your job posting. You’ll see the job title and location displayed at the top, followed by expandable sections where you can enter your job summary, responsibilities, required qualifications and company description.
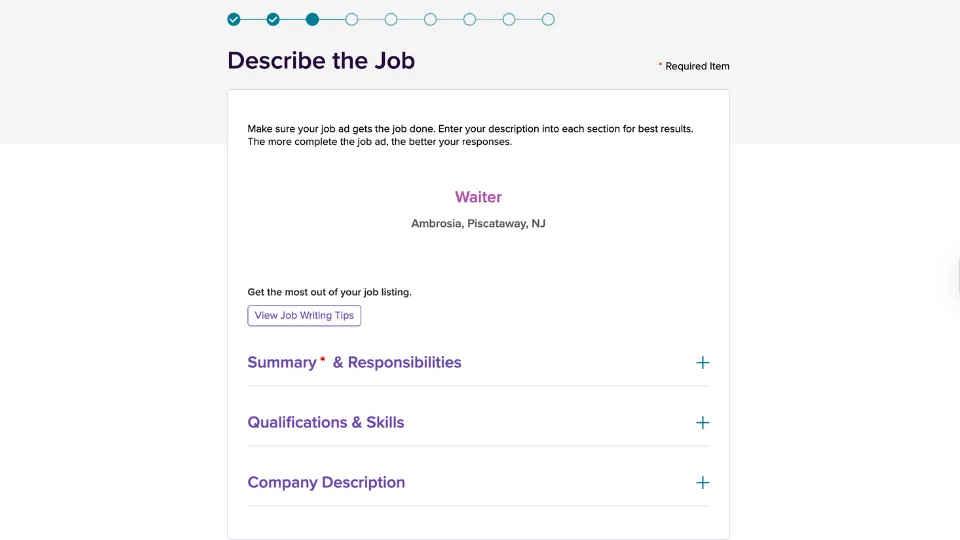
Filling out each section helps create a clear, complete job ad that attracts stronger candidates. You can also view job‑writing tips directly from this page to help you improve your listing before moving on.
7. Set your job application destination
In this step, Monster+ asks you to choose where candidates will submit their applications. You can have applicants apply directly through Monster, which keeps everything in one place, or you can direct them to apply on your own website instead.
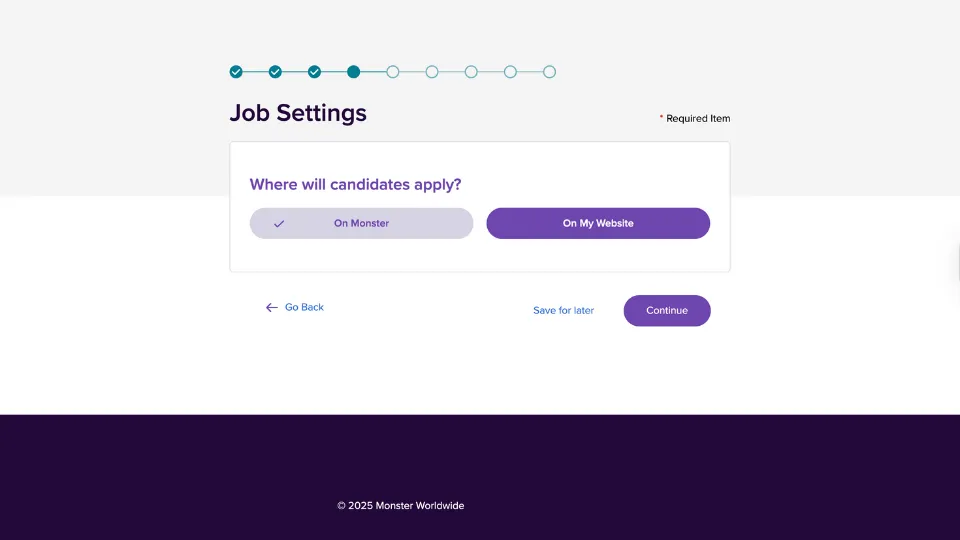
Simply select the option that works best for your hiring process, then click Continue to move forward with creating your job post.
The Fastest Growing
Restaurant & Hospitality Job Platform
Looking for top paid jobs? Or Hiring for your business?
8. Finalize your job listing
In this step, Monster+ lets you review everything you’ve entered before publishing your job post. You’ll see a summary of your job title, company name and job location, along with edit icons next to each section in case you need to make changes.

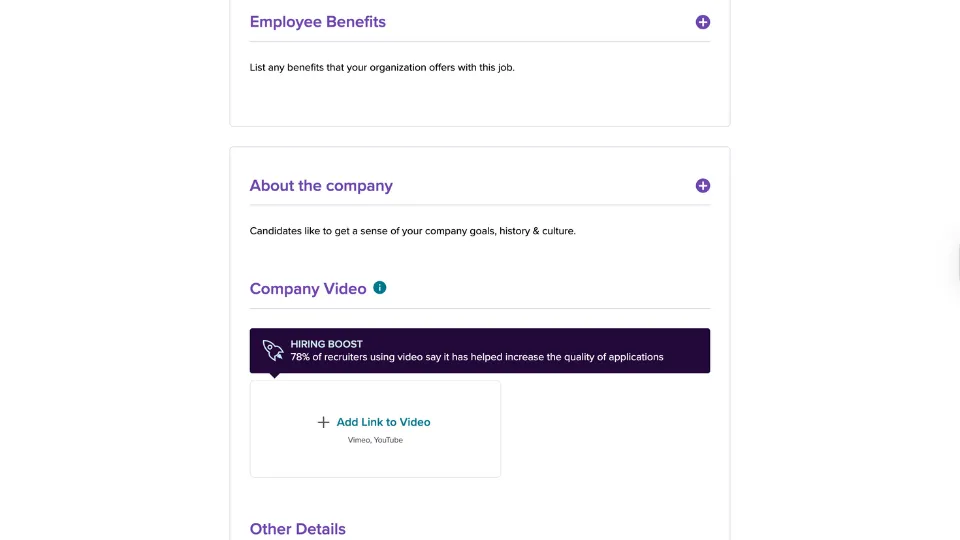
You also have the option to upload your company logo to help your listing stand out and strengthen your employer brand.
Below the logo section, you’ll find additional expandable areas where you can add more information about your company, including an overview of your goals, history and culture.
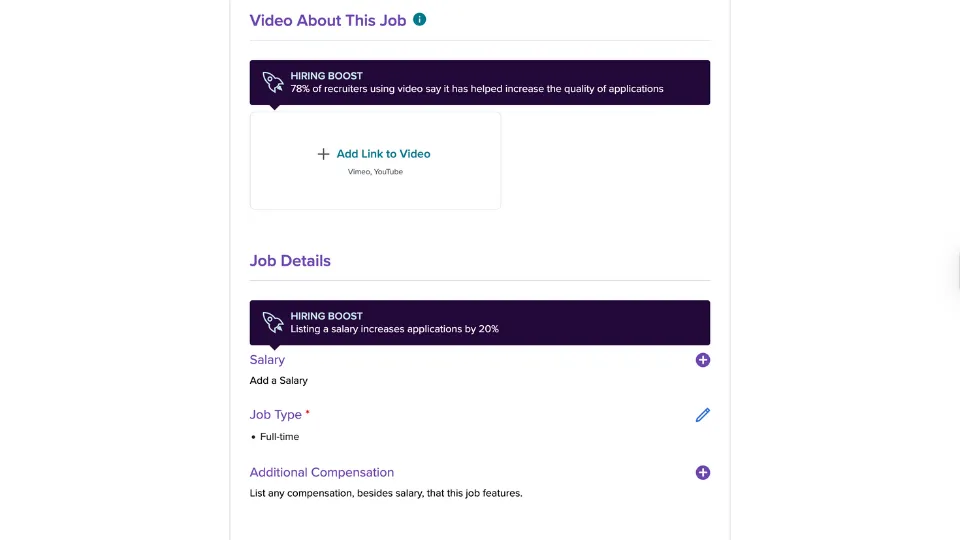
Monster+ also lets you include a company video by adding a YouTube or Vimeo link, which can help increase the quality of your applications.
Further down the page, you can refine your job details by adding salary information, listing any additional compensation and highlighting the key skills required for the role.
Once you’ve reviewed all details for accuracy and added any branding elements, you can proceed to the final posting steps.
9. Choose a budget
In this step, Monster+ asks you to set the daily budget for your job post using its pay‑for‑performance model.
This means you’ll only be billed when candidates actually view or apply to your listing.
The page recommends an average daily budget and shows an estimate of how many applications you can expect over 30 days based on the amount you set.
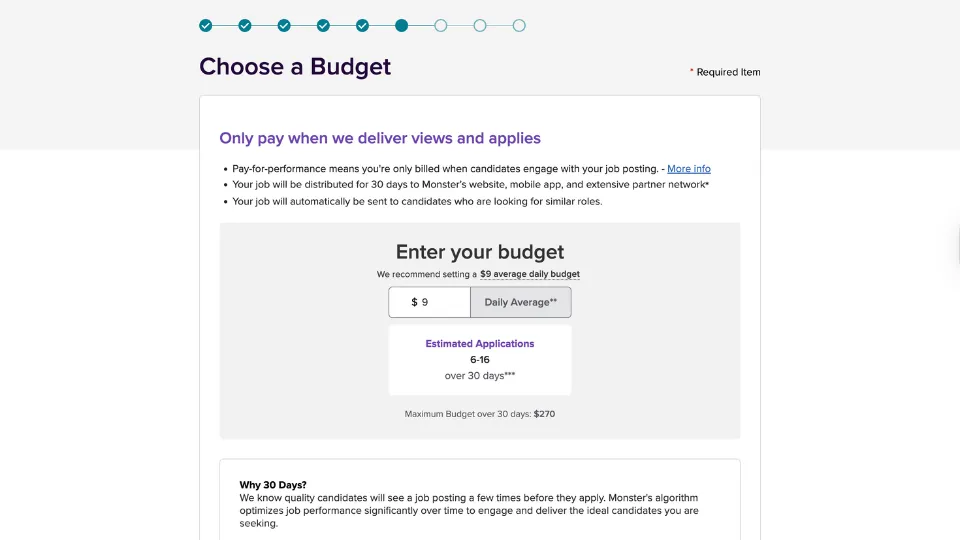
You can adjust the daily rate to fit your hiring needs, and Monster+ automatically calculates the maximum possible spend for the 30‑day period.
This section also explains why the posting runs for 30 days, noting that candidates often need multiple views before applying and that Monster’s algorithm uses this time to improve job visibility and match your listing with the right applicants.
10. Enter your payment information
In this final step, Monster+ prompts you to enter your payment details so your job post can go live.
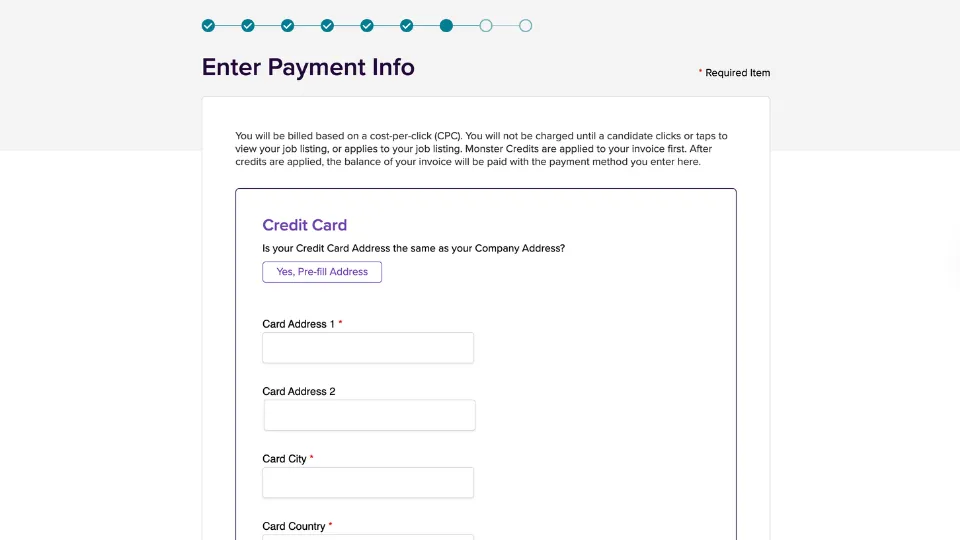
Since Monster+ uses a cost‑per‑click (CPC) model, you won’t be charged until a candidate clicks or taps to view or engage with your listing.
You’ll be asked to provide your credit card billing address, which you can pre‑fill using your company address or enter manually.
After entering your card address, city and country, you’ll complete the remaining payment fields to finalize your billing setup.
Once all payment information is submitted, your job posting is ready to move forward to the confirmation page, where you can officially publish your listing.
How Much Does It Cost To Post Jobs on Monster?
The cost to post jobs on Monster depends on whether you use Monster+ Standard or Monster+ Pro.
With Monster+ Standard, you set a daily budget that typically starts around $8 per day, and you only pay when candidates click or interact with your job ad, giving you flexible, performance‑based spending.
The Monster+ Pro plan, priced at $299 per month, includes unlimited user access so your entire hiring team can collaborate, along with monthly credits that you can use toward promoted job postings and resume search.
Is There a Free Monster Job Posting Option?
Yes, Monster offers a free posting option where you can post one job at no cost every 30 days.
However, the free posting has limitations.
Monster notes that free listings receive limited visibility and may generate only a small number of applicants, typically up to 3 per job.
To reach more candidates, improve visibility or access features like resume search, employers need to use a paid plan.
Best Place To Post a Job Opening for Hospitality
For hospitality employers, OysterLink is one of the best places to post a job opening because it's built specifically for restaurants, bars, hotels and other service‑oriented businesses.
Unlike Monster, which serves a wide range of industries and often attracts applicants without hospitality experience, OysterLink focuses on candidates who already have the skills needed for front‑of‑house, back‑of‑house and hotel roles.
This results in more qualified matches and less time spent filtering resumes.
OysterLink also makes the posting process extremely fast and simple, allowing you to publish a job in just a few steps using a clean, easy‑to‑use form that collects only the essential details.
Beyond posting jobs, OysterLink provides additional hiring support, including access to interview questions and answers you can use during screening and hospitality‑specific job descriptions to help you build stronger listings.
It also offers industry demographics and statistics to guide your staffing decisions.
Employers can also explore labor laws to stay compliant and review transparent pricing options before posting.
The Fastest Growing
Restaurant & Hospitality Job Platform
Looking for top paid jobs? Or Hiring for your business?
Post a Job on Monster: Conclusion
Posting a job on Monster is a straightforward process that walks employers step by step from creating an account to finalizing payment and publishing a listing.
Monster+ offers flexibility through its pay-as-you-go model, tools for customizing your job post and options to promote your listing based on your hiring needs.
While Monster provides broad reach and a full suite of recruiting features, employers in the hospitality industry may benefit even more from platforms built specifically for their field.
OysterLink offers a faster, simpler posting experience along with a highly targeted applicant pool, making it easier to connect with qualified hospitality professionals.


Loading comments...