
Nobody wants to fumble with a dull knife when trying to impress patrons. If you’ve been curious about how to sharpen Bartender knives effectively, you’ve come to the right place!
This article will dive into the essential tools, techniques and maintenance tips needed to keep your knives in top shape, helping you serve up cocktails like a true professional.
Types of Knives Used in Bartending
Before diving into the sharpening methods, it's essential to know the different types of knives that Bartenders typically use. Understanding these tools will help you appreciate their strengths and how to maintain them properly.
Here are the essential knives every Bartender should be familiar with:
- Paring knives: These small, versatile knives are perfect for peeling fruits, intricate cutting tasks and precision work. Their short blade allows for control, making them ideal for tasks like segmenting citrus or creating garnishes.
- Channel knives: Specialized for carving decorative grooves and twists, channel knives are essential for creating visually appealing cocktails. They can enhance the appearance of your drinks with their unique garnishes.
- Zester knives: These handy tools are designed to remove the flavorful zest from citrus fruits without digging into the bitter pith. Well-zested citrus adds a burst of flavor and a delightful aroma to cocktails.
- Utility knives: Often referred to as all-purpose knives, they are versatile and can handle various cutting tasks. They are perfect for chopping herbs or slicing thicker fruits, making them an essential part of any bartender's toolkit.
Signs Your Knife Needs Sharpening
Knowing when to sharpen your knives is crucial for maintaining their effectiveness. Here are several indicators to watch for that signal your trusty blade may need some attention:
- Difficulty slicing through fruits and garnishes: If you notice that your knife isn't gliding smoothly through produce, it’s a clear sign that it’s not sharp enough.
- Increased hand strain during use: A dull knife requires more effort to cut, which can lead to fatigue or even frustration. If you find yourself exerting more energy than necessary, it’s time to sharpen.
- Dull sound when cutting: A sharp knife typically makes a clean slicing sound, whereas a dull knife will feel more “thud-like” when it hits the cutting surface. This auditory feedback is a good indicator of sharpness.
- Visual examination: Look for nicks or a shiny, flat edge on your blade. A dull knife often has a reflective surface where it has been worn down rather than a sharp edge.
Sharpening Tools And Safety Gear
Armed with the knowledge of when to sharpen your knives, it’s time to gather the necessary tools for the job. The right instruments can make all the difference.
Sharpening stones
Sharpening stones or whetstones are the classic choice for sharpening a knife. Whetstones come in various grits, which serve different purposes.
Coarse grits (approximately 220) are useful for reshaping dull edges, while medium grits (around 1000) can maintain a sharp edge. Fine grits (up to 6000) polish the blade, making it razor-sharp.
It's also essential to keep your whetstone flat and clean; if it becomes uneven or dirty, it can affect how evenly your knives are sharpened. Always remember to soak the whetstone in water for about 10–15 minutes before use. This process creates a slurry that aids in sharpening and helps prevent the blade from overheating.
Honing rods
Honing rods are tools designed to realign the edge of your knife, helping to maintain its sharpness between sharpening sessions. They come in various materials, such as ceramic and steel, so choose one based on your personal preference and the type of knives you typically use.
Unlike sharpening, honing aligns the knife's edge, keeping it effective and ensuring optimal performance.
Make honing a part of your regular routine by honing your knife before each shift at the bar. This straightforward practice keeps your knives functioning optimally without the need for frequent sharpening.
Manual and electric sharpeners
Safety gear
When sharpening knives, prioritizing safety is critical to prevent accidents and injuries. Here are some important safety considerations to keep in mind while sharpening your bartending knives:
- Cut-resistant gloves: Wearing these gloves protects your hands while handling sharp knives, especially if you're new to sharpening.
- Stable surface: Always work on a stable surface that won’t shift during the sharpening process, ensuring that you don’t lose control over the knife.
- Eye protection: Depending on the sharpening technique you choose, wearing safety goggles can prevent any debris from flying into your eyes.
How To Sharpen Bartender Knives
Now that you have the right tools, let’s walk through the actual process of sharpening your Bartender knives. Following this method will enable you to achieve the best results every time.
1. Preparing for sharpening
To begin the sharpening process, start by thoroughly cleaning your knife to eliminate any debris or moisture that could impact the sharpening. It’s important to clear your workspace of any distractions and create a safe environment where you can focus.
Next, set up your station with all the necessary sharpening tools, a cloth for cleaning and enough space to work comfortably without interruptions. Before you start sharpening, take a moment to inspect the knife for any visible damage or irregularities. Understanding its condition will help you gauge how much sharpening is needed.
Finally, make sure to wear your cut-resistant gloves and goggles to protect yourself as you proceed with sharpening. Taking these precautions will ensure a safe and effective sharpening experience.
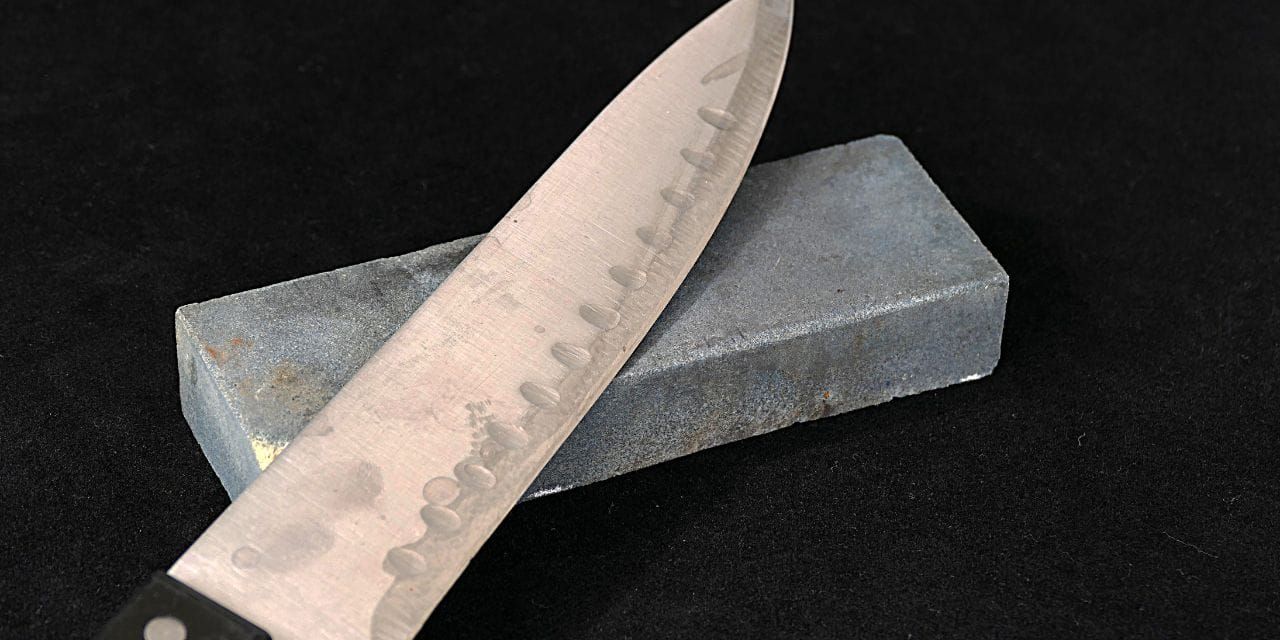
2. Using a whetstone
Now that you’ve prepared your knife and workstation, it’s time to start sharpening using a whetstone. Here’s what you need to do:
- Soak the whetstone: Immerse the whetstone in water for about 10–15 minutes. This allows it to create a lubricating layer that facilitates a smoother sharpening process.
- Determine the angle: Hold the knife at a 20-degree angle relative to the stone. A precise angle allows for a better edge.
- Sharpen the stroke: Starting from the heel of the knife, pull the blade across the stone while applying light pressure. Move towards the tip, making smooth, even strokes.
- Switch sides: After about 5–10 strokes on one side, switch to the other edge and repeat the process to maintain balance on the blade.
- Refine the edge: Once you’re satisfied with the sharpness, move to a finer grit whetstone to polish the blade. This step enhances the smoothness of the cut.
For a visual demonstration of these techniques, check out the video below:
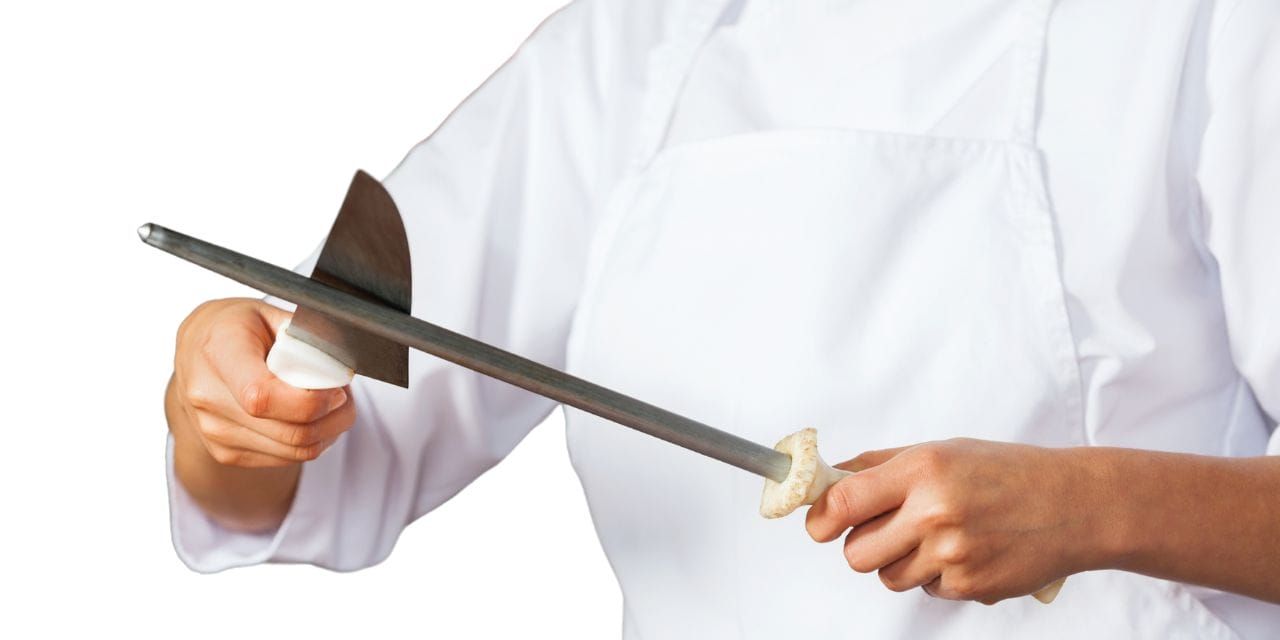
3. Honing techniques
After using the whetstone, it’s time to hone your knife. Follow these steps:
- Position the honing rod: Hold the honing rod vertically, ensuring it remains stable while you work.
- Grip the knife: Hold the knife at the same 20-degree angle as you did with the whetstone.
- Carry out the honing motion: Starting from the heel, draw the blade down the rod towards the tip with a steady, controlled motion. Repeat this 5–10 times on each side to realign the edge effectively.
To see these steps in action, play the video below:
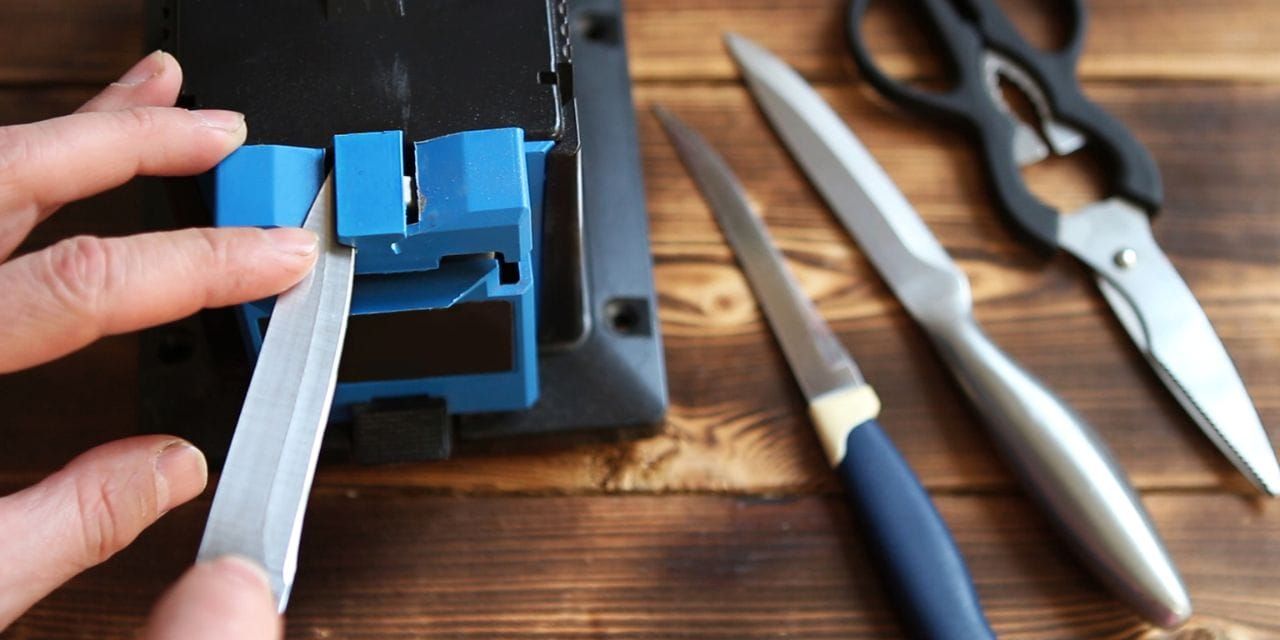
4. Using a manual/electric sharpener
If you prefer using a sharpener designed for quick use, here’s how to do it. For a manual sharpener, start by inserting the knife blade into the designated slot. Gently pull the knife through the sharpener while applying light pressure, and make sure to use both the coarse and fine slots for optimal results.
If you decide to use an electric sharpener, carefully insert the knife according to the manufacturer's instructions. Once inserted, turn on the sharpener and glide the knife through the slots, covering the full length of the blade for the recommended number of pulls.
After sharpening, it's important to test the knife's sharpness. You can do this by slicing through a piece of paper or a soft piece of fruit. A clean, smooth cut indicates that your knife has been successfully sharpened.
5. Inspect and clean
After sharpening, rinse the knife to remove any metal shavings and dry it right away to prevent rust. Check the edge for any nicks or rough spots. If you find any, a quick hone can help restore sharpness.
Staying Safe While Sharpening Your Knives
When working with sharp tools, safety is paramount. Here are a few tips to ensure you work safely while sharpening your knives:
- Grip the knife correctly: Always hold the knife by the handle and keep your fingers away from the blade. Use your other hand to guide the item being cut.
- Use a cutting board: A stable cutting board not only makes cutting easier but also keeps the knife from slipping.
- Don’t rush: Take your time when sharpening. Rushing can lead to mistakes and potential injury.
- Beware of fatigue: If you’re working in a busy bar environment, take breaks to avoid fatigue, which can lead to accidents. Make sure to stay focused and alert throughout the sharpening process.
8 Maintenance Tips To Keep Your Knives Sharp
Sharp knives are a Bartender’s best friend, so maintaining them is essential for consistent performance. Here are eight effective tips to keep your knives in the best shape:
- Hone frequently: Make honing a regular part of your knife care routine. Honing before each shift helps maintain sharpness, allowing you to work more efficiently throughout the night.
- Schedule sharpening: Depending on how often you use your knives, schedule sharpening sessions every few weeks or whenever you notice diminished performance. This proactive approach keeps your tools in excellent condition.
- Use a blade guard: If you don’t have a knife block, consider getting blade guards for storage. These guards protect the edges from nicks and dulling while keeping you safe from accidental cuts.
- Store in a knife block or magnetic strip: Place your knives in a designated location like a knife block or a magnetic strip. This not only keeps them organized but also prevents them from knocking against other utensils that could dull the blades.
- Avoid clutter: Keep your knives separate from other utensils in drawers. Clutter can cause damage and scraping, leading to dull edges.
- Control temperature: Avoid storing knives in damp or humid places, as this can lead to rust. A cool, dry environment is best to maintain their quality.
- Wash by hand: Always wash your knives by hand rather than in the dishwasher. The harsh environment of a dishwasher can cause nicks and dulling due to jostling with other items.
- Dry immediately: After washing, dry your knives right away. This practice helps prevent the formation of rust and keeps your knives looking and performing their best.
Conclusion
Now that you know how to sharpen Bartender knives, you can enhance your efficiency and performance behind the bar. A sharp knife makes it easier to prepare garnishes and cocktails quickly and accurately.
As you refine your skills at the bar, check out OysterLink for more career advice and industry insights. With valuable resources at your fingertips, you can continue to grow as a Bartender and navigate your career in the restaurant industry.

Written by Sasha Vidakovic
Sasha is an experienced writer and editor with over eight years in the industry. Holding a master’s degree in English and Russian, she brings both linguistic expertise and creativity to her role at OysterLink. When she's not working, she enjoys exploring new destinations, with travel being a key part of both her personal and professional growth.

Reviewed by Marcy Miniano
Marcy is an editor and writer with a background in public relations and brand marketing. Throughout her nearly decade-long career, she has honed her skills in crafting content and helping build brands across various industries — including restaurant and hospitality, travel, tech, fashion and entertainment.
.png)

.png)
.png)